Learn how to choose a safe paint for bird cages, including non-toxic options such as water-based, acrylic, and milk paints. Follow our guide for proper preparation, application, and maintenance to ensure a safe and beautiful cage for your feathered friend.
Choosing Safe Paint for Bird Cages
When it comes to painting bird cages, it is crucial to prioritize the safety and well-being of our feathered friends. Birds are sensitive creatures, and using the wrong type of paint can have serious health consequences for them. In this section, we will explore different options for safe paints that are suitable for bird cages.
Non-Toxic Paint Options
When selecting paint for your bird cage, it is essential to choose non-toxic options. Non-toxic paints are specially formulated to be safe for animals, including birds. These paints are free from harmful chemicals and fumes that could potentially harm your avian companion.
One popular option is water-based paint. Water-based paints are generally safe for birds as they have low levels of volatile organic compounds (VOCs). These paints are easy to clean up and have a fast drying time, making them convenient for bird cage painting projects.
Water-Based Paints
Water-based paints are a fantastic choice for bird cages due to their low toxicity and ease of use. These paints are typically made from a combination of water, acrylic resin, and pigments. They do not emit strong odors or fumes, which is essential for the health of your bird.
To apply water-based paint to your bird cage, you can use a paintbrush or roller. These tools allow for precise application and ensure even coverage. Before painting, make sure to thoroughly clean and prep the surface of the bird cage to achieve the best results.
Acrylic Paints
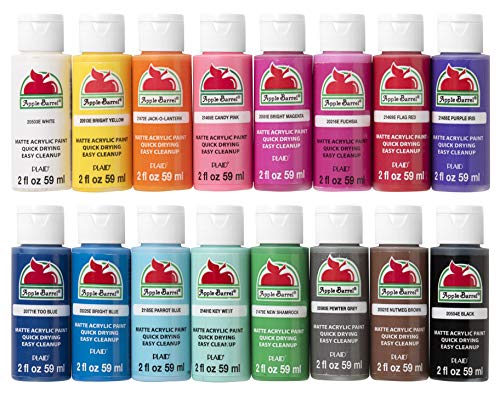
Another safe paint option for bird cages is acrylic paint. Acrylic paints are water-based and contain pigment suspended in an acrylic polymer emulsion. These paints are known for their vibrant colors and durability.
Acrylic paints are non-toxic and provide a safe environment for your bird. They are also water-resistant once dried, making them suitable for areas where there may be exposure to moisture or humidity. These paints can be applied using a paintbrush or sprayed onto the cage surface for a smooth finish.
Milk Paints
Milk paint is a natural and non-toxic option for painting bird cages. It is made from milk protein (casein), lime, pigments, and a natural binder, such as clay or chalk. Milk paint has been used for centuries and is known for its environmentally friendly properties.
To apply milk paint to your bird cage, mix the powdered milk paint with water according to the manufacturer’s instructions. Apply the paint using a paintbrush, and allow it to dry between coats. Milk paint provides a unique matte finish that adds character to your bird cage.

In summary, when choosing a safe paint for your bird cage, consider non-toxic options such as water-based paints, acrylic paints, and milk paints. These paints are specifically formulated to be safe for birds and do not emit harmful fumes or chemicals. Remember to always follow the manufacturer’s instructions and allow sufficient drying time before introducing your bird back into the freshly painted cage.
Now that we have explored the various safe paint options for bird cages, let’s move on to the next section, where we will discuss how to prepare the bird cage before painting.
Preparing the Bird Cage for Painting
When it comes to painting a bird cage, proper preparation is key to ensure a safe and long-lasting finish. In this section, we will discuss the important steps involved in preparing the bird cage for painting.
Thorough Cleaning and Drying
Before you begin painting, it is essential to thoroughly clean the bird cage. This will help remove any dirt, debris, or bird droppings that may be present on the surface. Start by removing any removable parts such as perches, feeders, and trays.
To clean the cage, you can use a mild dish soap or bird-safe cleaner diluted in water. Gently scrub the entire cage, including bars, corners, and hard-to-reach areas. Pay special attention to areas where dirt or droppings may have accumulated.
After cleaning, rinse the cage thoroughly with clean water to remove any soap residue. It is important to ensure that the cage is completely dry before proceeding to the next step. Moisture trapped under the paint can cause it to peel or bubble, which can be harmful to your birds.
Removing Rust and Old Paint
If your bird cage has any rust or old paint, it is crucial to remove these before applying a new coat. Rust can corrode the cage and pose a health hazard to your feathered friends, while old paint may contain toxic substances that could harm them.
To remove rust, you can use a wire brush or sandpaper to gently scrub the affected areas. Make sure to wear gloves and a mask to protect yourself from any loose particles. Once the rust has been removed, wipe down the cage with a damp cloth to remove any debris.
If there is old paint on the cage, you may need to use a paint stripper to remove it completely. Follow the instructions provided by the manufacturer and take necessary safety precautions. Once the old paint has been stripped, clean the cage again to remove any residue.

Sanding the Surface
After cleaning and removing rust or old paint, it is recommended to sand the surface of the bird cage. Sanding helps to create a smooth and even surface for the new paint to adhere to. It also helps in removing any remaining rough patches or imperfections.
Start by using a fine-grit sandpaper and gently sand the entire cage, including bars, corners, and edges. Be careful not to apply too much pressure, as you do not want to damage the cage. Sanding should be done in a well-ventilated area, preferably outdoors, to avoid inhaling any dust particles.
Once you have finished sanding, wipe down the cage with a clean cloth to remove any sanding dust. This will ensure a clean surface for the paint to adhere to.
By following these steps of thorough cleaning, removing rust and old paint, and sanding the surface, you are now ready to move on to the next phase of painting your bird cage. Remember, proper preparation is essential for a safe and successful painting project.
(Note: The next section will cover the different methods of applying paint to the bird cage.)
Applying Paint to the Bird Cage
When it comes to painting a bird cage, there are several methods you can use to apply the paint. Whether you choose to use a paintbrush or roller, spray the paint, or apply multiple coats, each option has its own advantages and considerations. Let’s explore these options in detail.
Using a Paintbrush or Roller
One of the most traditional and commonly used methods of applying paint to a bird cage is by using a paintbrush or roller. This method allows for precise control and ensures even coverage. When using a paintbrush, it’s important to select one specifically designed for the type of paint you are using, whether it’s water-based, acrylic, or milk paint.
To begin, dip the paintbrush into the paint and remove any excess by gently tapping it against the side of the paint can. Start applying the paint to the bird cage in smooth, even strokes, working from top to bottom. Take care to cover all areas, including corners and crevices. If you notice any drips or uneven areas, simply go over them with the brush to smooth them out.
Alternatively, you can use a paint roller for larger surfaces of the bird cage. This method allows for faster application and can provide a more uniform finish. Start by pouring the paint into a tray and rolling the roller into the paint, making sure it is evenly coated. Then, apply the paint to the bird cage using long, even strokes. Remember to work in small sections at a time to ensure the paint doesn’t dry before you have a chance to smooth it out.
Spraying the Paint
Another option for applying paint to a bird cage is by using a spray gun or aerosol spray paint. This method offers a quick and efficient way to cover large areas and hard-to-reach spots. However, it requires careful preparation and attention to detail.
Before spraying the paint, it’s important to create a well-ventilated area to minimize the inhalation of fumes. You may want to set up a spray booth or work outside in a well-ventilated space. Cover the surrounding area with drop cloths or newspaper to protect against overspray.
When using a spray gun, adjust the nozzle to achieve the desired spray pattern and pressure. Hold the gun approximately 6 to 8 inches away from the bird cage and move it in a steady back-and-forth motion, overlapping each pass slightly. Be sure to cover all surfaces evenly and avoid excessive buildup in one area. If using aerosol spray paint, follow the instructions on the can for proper application techniques.
Applying Multiple Coats
Regardless of the method you choose, it’s often necessary to apply multiple coats of paint to achieve a durable and long-lasting finish. Applying multiple thin coats is preferable to one thick coat, as it allows for better adhesion and reduces the risk of drips or runs.
After the first coat has dried, lightly sand the surface with a fine-grit sandpaper to create a smooth and slightly roughened texture. This will help the subsequent coats of paint adhere better. Remove any dust or debris with a clean cloth before applying the next coat.
Repeat the application process for each additional coat, ensuring proper drying time between coats. This will depend on the type of paint you are using, so be sure to refer to the manufacturer’s instructions for specific drying times. Applying multiple coats will help enhance the durability and longevity of the paint, providing a protective barrier for the bird cage.
Drying and Curing the Paint
Allowing Sufficient Drying Time
When it comes to painting a bird cage, allowing sufficient drying time is crucial for ensuring the safety of your feathered friend. The drying time of the paint you use will depend on the type and brand, so it’s essential to follow the manufacturer’s instructions. Generally, water-based paints tend to dry faster compared to other types.
To determine if the paint is dry, gently touch the surface with the back of your hand. If it feels cool or sticky, it’s not fully dry yet. Rushing the drying process can lead to smudges, streaks, or even the paint peeling off once the bird starts using the cage. Patience is key here, as you wouldn’t want your bird to come into contact with wet paint and potentially ingest harmful chemicals.
Creating a Well-Ventilated Area
While waiting for the paint to dry, it’s essential to create a well-ventilated area to ensure the safety of both your bird and yourself. Paint fumes can be toxic, so proper ventilation is necessary to minimize any potential harm. Open windows and doors to allow fresh air to circulate, or consider using fans or air purifiers to improve air circulation.
If the weather permits, you may even consider painting the bird cage outdoors. However, make sure you choose a shaded area to prevent direct sunlight from causing the paint to dry too quickly. Additionally, avoid painting on windy days to prevent dust or debris from sticking to the wet paint.
Curing the Paint for Maximum Safety
Curing the paint involves allowing it to fully harden and reach its maximum durability. This process is especially important when it comes to ensuring the safety of your bird. Curing time varies depending on the type of paint used, but it typically ranges from a few days to a couple of weeks.
During the curing process, it’s crucial to keep your bird away from the freshly painted cage. The chemicals in the paint may still be volatile and could pose a risk to your bird’s health. Find a temporary housing solution for your bird while the paint cures, ensuring it has a comfortable and safe environment.
To promote the curing process, you can place the painted bird cage in a well-ventilated area with good air circulation. Avoid covering the cage with any cloth or plastic, as this may hinder the curing process. Additionally, avoid placing any accessories or toys inside the cage until the paint has fully cured to prevent potential contamination.
Once the paint has fully cured, you can safely reintroduce your bird to its freshly painted cage. Regularly inspect the painted surface for any signs of peeling or chipping, and address them promptly to maintain a safe environment for your feathered friend.
Remember, patience is crucial when it comes to drying and curing the paint on a bird cage. By allowing sufficient drying time, creating a well-ventilated area, and ensuring proper curing, you can provide a safe and visually appealing living space for your beloved bird.
Maintaining a Safe Painted Bird Cage
Keeping your bird cage safe and in good condition is essential for the health and well-being of your feathered friend. Once you have painted your bird cage with a safe and , it’s important to maintain it properly. In this section, we will discuss some key steps for maintaining a safe painted bird cage.
Regular Cleaning and Inspection
Regular cleaning and inspection of your painted bird cage is crucial to ensure the safety and health of your bird. Birds are sensitive creatures, and any buildup of dirt, droppings, or debris can lead to health issues. Here are some tips for regular cleaning and inspection:
- Clean the Cage: Regularly clean the cage using mild soap and water. Avoid using harsh chemicals or cleaners that could potentially harm your bird. Make sure to remove any droppings, food debris, or feathers from the cage.
- Inspect for Damage: Take the time to inspect the cage for any signs of wear and tear or damage. Look for any chipped or peeling paint, rust, or loose parts. These can pose a danger to your bird and should be addressed immediately.
- Check for Proper Fit: Ensure that all parts of the cage are securely fastened and in good condition. Check the doors, latches, and perches to make sure they are stable and safe for your bird to use.
- Replace Worn Accessories: If you notice any worn or damaged accessories such as perches or toys, replace them promptly. Birds rely on these items for exercise and mental stimulation, so it’s important to provide them with safe and enjoyable options.
Touching Up Scratches or Chips
Over time, it’s natural for a painted bird cage to develop minor scratches or chips. These can occur from your bird’s beak, toys, or other interactions. While these small imperfections may not pose an immediate danger, it’s still important to address them to maintain the integrity of the paint and the overall safety of the cage. Here’s how you can touch up scratches or chips:
- Prepare the Surface: Before touching up scratches or chips, make sure to clean the affected area. Use a mild detergent and water to remove any dirt or debris. Allow the area to dry completely before proceeding.
- Choose the Right Paint: Use the same type of that you initially used to paint the cage. This will ensure consistency in color and safety for your bird. If you no longer have the original paint, contact the manufacturer or a pet store specializing in bird supplies for recommendations.
- Apply the Paint: Using a small brush, carefully apply a thin layer of paint to the scratched or chipped area. Be sure to follow the manufacturer’s instructions for drying time and application. Allow the paint to dry completely before reintroducing your bird to the cage.
- Inspect the Touch-Up: Once the paint is dry, inspect the touch-up area to ensure it blends well with the surrounding paint. Smooth out any uneven edges or excess paint. This will help maintain the aesthetic appeal of the cage while keeping it safe for your bird.
Reapplying Paint as Needed
Over time, the paint on your bird cage may begin to fade or wear off. In such cases, it may be necessary to reapply paint to keep the cage safe and visually appealing. Here are some steps to guide you through the process:
- Prepare the Surface: Thoroughly clean the entire cage, removing any dirt, debris, or loose paint. Use a mild detergent and water, and ensure the cage is completely dry before proceeding.
- Choose the Right Paint: Select a that is specifically formulated for use on bird cages. Avoid paints that contain lead, zinc, or other harmful chemicals. Water-based paints, acrylic paints, and milk paints are all safe options to consider.
- Apply Multiple Coats: Apply the paint using a paintbrush or roller, ensuring even coverage. Start with a thin coat and allow it to dry before applying additional coats as needed. Follow the manufacturer’s instructions regarding drying time and the number of coats recommended.
- Create a Well-Ventilated Area: While painting, make sure to provide adequate ventilation in the room. This will help prevent the buildup of fumes and ensure a safe environment for both you and your bird.
- Allow Sufficient Drying Time: After the final coat of paint has been applied, allow the cage to dry completely. This may take several hours or even overnight. Avoid reintroducing your bird to the cage until the paint is fully cured and any residual odor has dissipated.
By following these steps for maintaining a safe painted bird cage, you can ensure the longevity and safety of your bird’s habitat. Regular cleaning and inspection, along with addressing any scratches or chips, will help keep the cage in optimal condition. If needed, reapplying paint using non-toxic options will not only refresh the appearance of the cage but also maintain a safe and healthy environment for your feathered companion. Remember, your bird’s safety and well-being should always be a top priority.